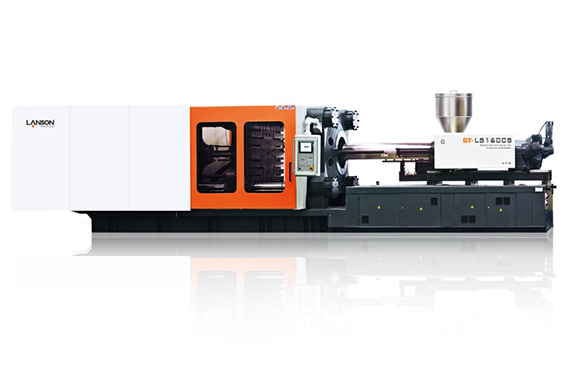
What are the adjustment methods in the installation of the lunch box injection molding machine? Today, Liansheng injection molding machine manufacturer shares several adjustment methods:

During installation, the injection molding machine should be adjusted and its accuracy checked to meet its performance requirements:
1. To adjust the parallelism of clamping part guide rails, use a precision level gauge to conduct longitudinal and transverse rough adjustment of the two quenched guide rails (fix the horizontal bubbles with adjustable lifting shims), use a parallel ruler to pass through the two guide rails, and place the level gauge on the horizontal and transverse roughened parallel ruler. Tune. Adjust Figure 7-1. For large and medium-sized combined injection molding machines, use a level gauge to adjust the parallelism of injection molding guide rails, install the locating pins connecting the clamping device and injection molding device, and tighten the connecting bolts and nuts.
2. Check and adjust the levelness of the movable template guide post, and use the precision level to level the guide post vertically and horizontally. The level shall be placed horizontally first and then vertically. Repeat the measurement and adjustment until the requirements are met. Transverse measurement also requires a parallel ruler across two guide posts. Allowable tolerance: 0.16mm/m horizontally. Longitudinal 0.24mm/mm.
3. Check and adjust the parallelism between templates. The parallelism between the mobile template used in manufacturing and the template reference plane has been adjusted in the factory and is usually stable. However, this parameter may change due to transportation and installation. Therefore, check and adjust after installation. This parameter should be adjusted by professionals.
4. The coaxiality of nozzle and mold positioning center hole shall be adjusted, and the coaxiality of nozzle and mold positioning center shall be adjusted after the horizontal and vertical adjustment of template and body.
Two adjustment methods for lunch box injection molding machine:
(1) Loosen the fastening screws connecting the front and rear brackets of the fuel injector base guide rod with the engine body; Loosen the lock nuts on the horizontal adjusting bolts on both sides of the front support of the fuel injector base guide rod.
(2) Measure L1, L2, L3 and L4 along the horizontal and vertical directions of the diameter with a vernier caliper with an accuracy of more than 0.05mm. When measuring, pay attention to adjusting the horizontal adjusting bolt so that L1=L2; Adjust the upper and lower adjusting screws so that L3=L4. The measurement error shall not exceed 1/2 of the concentricity given in the following table.
(3) When adjusting the coaxiality of the nozzle and the positioning center hole of the mold, the guide rod of the injection base may change, causing the clearance between the screw and the barrel to move and wear; Therefore, when adjusting the coaxiality of the nozzle and the mold positioning center hole, it is necessary to measure and adjust the level of the injection base guide rod (tolerance value 0.05/m); Use a feeler gauge to measure the clearance between the screw tail and the cylinder.
Connection of cooling water pipe of lunch box injection molding machine: there are generally three cooling water pipes of injection molding machine, namely hydraulic oil cooling circuit (oil cooler), barrel cooling circuit, mold cooling circuit, and pipes from water supply source. It is divided into two pipes, one connected to the oil cooler and the other to the distributor, which are respectively connected to the cylinder and the mold economically. Connection of cooling water pipe.
Other installation matters of lunch box injection molding machine:
1. All parts removed during installation and transportation, such as hoppers, storage drums (automatic feeding bins), etc.
2. Install and connect power cables and other circuits according to relevant national standards and user requirements.
3. After completing all installation items, check the steering of the injection molding machine oil pump. The specific operation precautions are as follows:
A. Inject the hydraulic oil that is higher than the standard into the oil tank. The oil tank must be clean, otherwise it should be clean.
B. Turn on the power switch.
C. Operation Plastic injection molding machine Turn off the oil pump motor immediately after inching the oil pump motor switch on the panel to check whether the oil pump rotates correctly. If not, replace the wiring of the oil pump motor in time.


